I was surprised that when I announced to people my intention to pickle carrots, there were some who thought this was not a good idea. Within my circle of friends, there are some fairly fervent pickled-carrot lovers, and I really believed this was a widespread fondness.
If you like carrots. And if you like pickles (i.e. pickled beets, pickled hot peppers, pickled green beans). Why not pickled carrots?
Adarsh, in particular, was not too enthusiastic about the idea. Mostly, I think, because I slapped his hand away from the gorgeous organic carrots I bought (well, technically he bought…) at the farmer’s market (just for the purpose of pickling!), that he was just dying to crunch into.
He was further unimpressed with me and my hand-slapping when those gorgeous carrots went soft and turned into muffins instead – which he huffily called “carrot cemeteries” and then refused to eat…
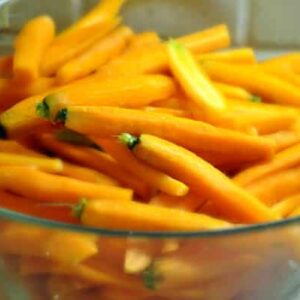
Gorgeous carrots, attempt #2!
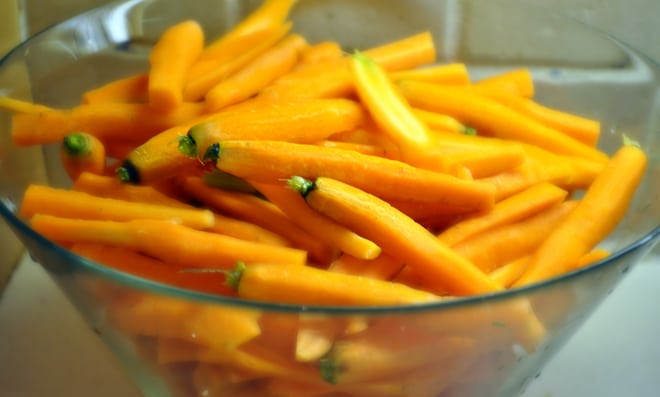
What I didn’t realize when I embarked on this vinegar-soaked adventure, was that of the art pickle-making is a flippin’ *$#@load of work fun, but laborious task. The peeling, oh the peeling! . I love my mother all the more for the number carrots she has peeled in her life, while I feigned deafness to her calls for assistance.
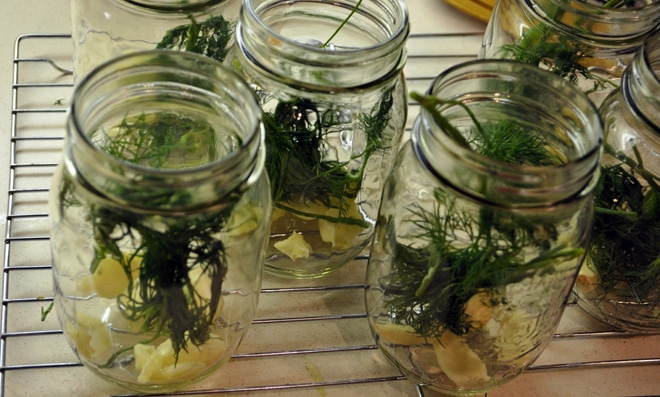
Aside from removing their peel, the carrots didn’t really give me too much trouble. The pickling concept is very simple, and not nearly as scary as it may seem to virgin pickle-makers. All you have to do is prepare that-which-is-to-be-pickled by cutting it into uniform sized pieces; prepare a brine of boiling vinegar, water, and salt; pack the veggies into sterilized (boiled) jars along with some pickling spice, garlic, and fresh dill; pour the brine into the jars; and boil the jars with their lids on for 10 minutes. Ta da! Pickles. No sweat. (Well, some sweat. But mostly during the goshdarn peeling stage).
You don’t need any fancy equipment to do your own preserving/canning/pickling at home. What you will need, besides the ingredients, are: the biggest pot you’ve got, a big pair of tongs with a rubber band secured around each tong (to prevent the jars from slipping out), glass jars and new lids (you can re-use jars, but you need brand-new lids every time – you can buy them separately and they’re cheap), and that’s it!
The reference book I used is The Art of Preserving from Williams-Sonoma. It is a fabulous book, one that has accompanied me to the beach, the park, on the bus, and to bed. Yeah, people gave me strange looks. Did I care? Nope!
Crunchy Carrot Pickles
Ingredients
- 6 lbs carrots or carrots and cauliflower florets combined, peeled and cut into uniform-sized sticks that will comfortably fit inside jars
- 4.5 cups distilled white vinegar 5% acidity
- 3 tbsp coarse salt
- 9 tbsp pickling spice
- 1 bunch fresh dill
- 2 heads of garlic cloves peeled
- 6 lbs carrots or carrots and cauliflower florets combined, peeled and cut into uniform-sized sticks that will comfortably fit inside jars
- 4.5 cups distilled white vinegar 5% acidity
- 3 tbsp coarse salt
- 9 tbsp pickling spice
- 1 bunch fresh dill
- 2 heads of garlic cloves peeled
Instructions
- Fill your largest pot with water. Sterilize your jars by submerging them (while the water is still cold - or they might break) and turn the heat on high. Bring to a boil. The jars need to boil for at least ten minutes, but keep them in the water till you're ready to fill them. You want to keep them warm because you will be processing them in boiling water again, and if they have time to cool off before returned to boiling water, they may break. Warm the lids in a small pot of simmering water (not boiling) over medium-low heat. Use the tongs to remove jars and lids from water.
- In another medium-large pot, combine vinegar, salt and 4.5 cups of water. Bring to a boil and stir to dissolve salt.
- Meanwhile, spoon 1 tbsp pickling spice into each jar. Divide the garlic and dill among jars (about 2-3 sprigs of dill per jar). Pack the carrots snugly into the jars. Ladle the hot brine into the jars, leaving 1/2 inch of headspace. Place a warm lid on top, and secure with a screwband to just-sealed (not too tight - air needs to escape). Using the rubber-banded tongs, lower the jars gently into the boiling water. Process for 7 minutes, timed from when the water returns to a boil. *
- Note that more is not better here - if you over-process them you will have soggy carrot pickles instead of crunchy ones.
- Remove from water and allow to cool, undisturbed, for 24 hours. The jars have sealed properly if the lids are rigid and slightly indented. You might hear a "pop!" when it seals. The lid should not bounce back when you gently press it. If it bounces back and makes a clicking sound when pressed, the seal is not good. Keep any failed seal jars in the fridge for 2 weeks. All sealed jars will keep in a dark, cool place for up to 1 year.


I like carrots